Safe Nose Options for Baby Amigurumi Toys
When crafting amigurumi for babies, toy safety, especially the choice of nose, is critically important. Discover the safest nose options and essential tips to prevent choking hazards in this post.
Safe Nose Options for Baby Amigurumi Toys
Handmade amigurumi toys are unique gifts that bring warmth and love into a baby's world. However, when crafting these adorable toys, our top priority must be ensuring the safety of our little ones. Especially for toys that babies love to put in their mouths, the choice of small details like noses and eyes is critically important. In this post, Ayla Wan Gurumi will share with you the safest nose options for baby amigurumi and what you need to pay attention to.
Why Is Safety So Important?
Babies explore the world by touching, feeling, and most importantly, by putting things in their mouths. Therefore, every part used in their toys must be securely attached and large enough not to be swallowed. Small, loose, or easily detachable parts pose a choking hazard and can lead to serious dangers. Ensuring your amigurumi toys are not only beautiful but also 100% safe will bring peace of mind to both you and the little ones.
Traditional Nose Options and Their Risks
There are many different nose options available for amigurumi in the market, but not all of them are suitable for babies:
1. Safety Noses
Safety noses are designed with a plastic locking mechanism at the back, generally intended to be irremovable from the outside. They are frequently preferred for amigurumi made for adults or older children.
Ayla Wan Gurumi Tip: Despite the word "safety" in their name, safety noses are generally not recommended for toys made for babies. Babies tend to chew and pull on their toys. Although rare, the locking mechanism at the back of these noses can loosen over time or detach if the product is of poor quality, creating a choking hazard. If you absolutely must use them, choose very high-quality products and ensure the lock is fully engaged when attaching them. Remember, they are not the safest option.
2. Buttons and Beads
These are options that should be absolutely avoided! Buttons and beads can easily come off and pose a serious choking hazard for babies. Never use buttons or beads in amigurumi baby toys.
Safest Nose Options for Babies
Here are the two safest nose options you can confidently choose for your amigurumi baby toys:
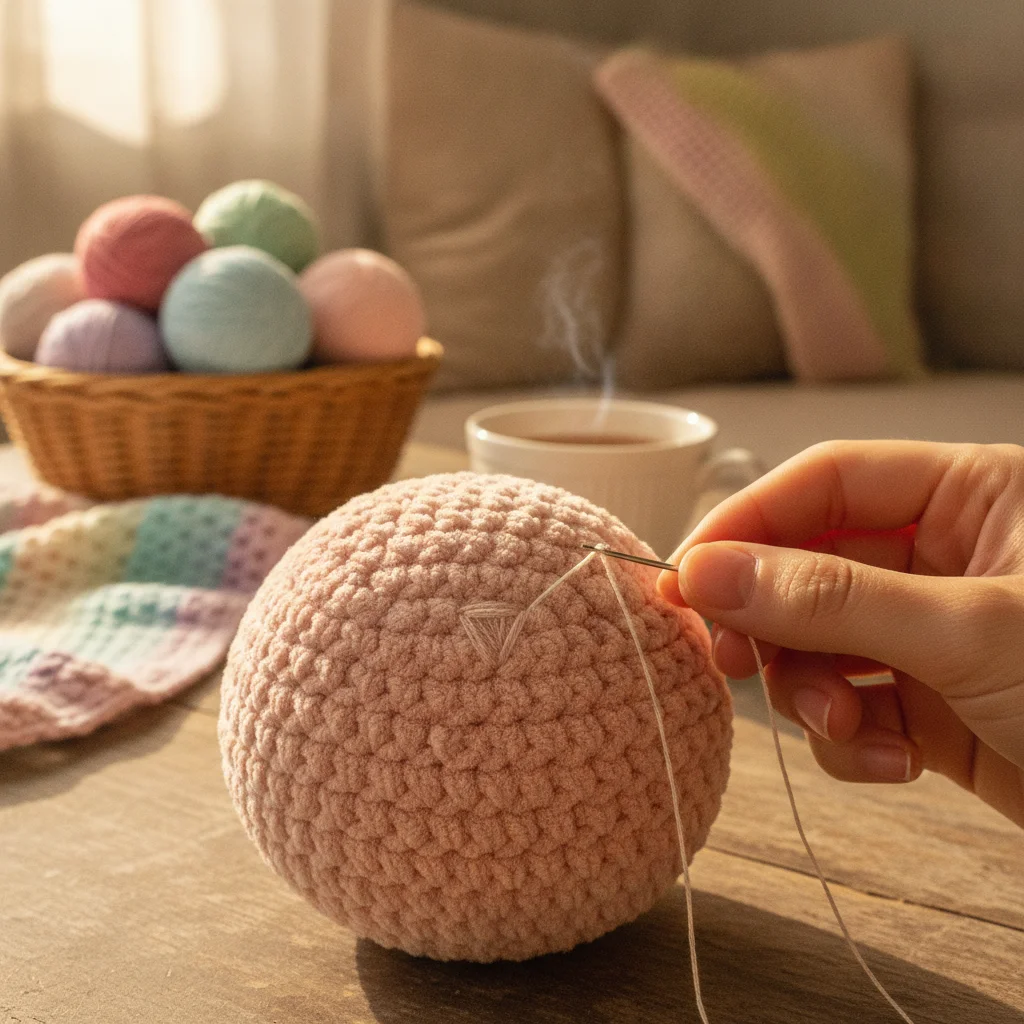
1. Embroidery Method
Embroidery is the safest and most recommended way to create amigurumi noses for babies. With this method, the nose shape is stitched directly onto the toy using its own yarn or suitable embroidery floss. This ensures there are no separate parts that can detach or come off.
How to Do It:
- Yarn/Thread Selection: Use the toy's own yarn (usually cotton or baby yarn) or a 100% cotton, durable embroidery floss. Acrylic yarns can also be suitable; the key is durability.
- Needle: Use a blunt-tipped embroidery needle or an appropriately sized yarn needle.
- Shape:
- Triangle Nose: One of the most common and adorable shapes. First, create a base line, then determine a point upwards from the middle of this line and fill in the triangle.
- V-Shape: For a more minimalist look, you can embroider a small "V" shape.
- Round/Oval Nose: You can achieve a fuller nose by drawing a small circle or oval and filling it in.
- Durability Tips:
- Start by securing the thread with a few small stitches inside the toy, rather than tying a knot.
- When embroidering, do not pull the thread too tightly, as this can pucker the toy's fabric.
- Once the embroidery is complete, secure the thread again with a few small stitches inside the toy and hide the remaining thread within the toy's stuffing. Be careful not to leave any knots exposed on the outside.
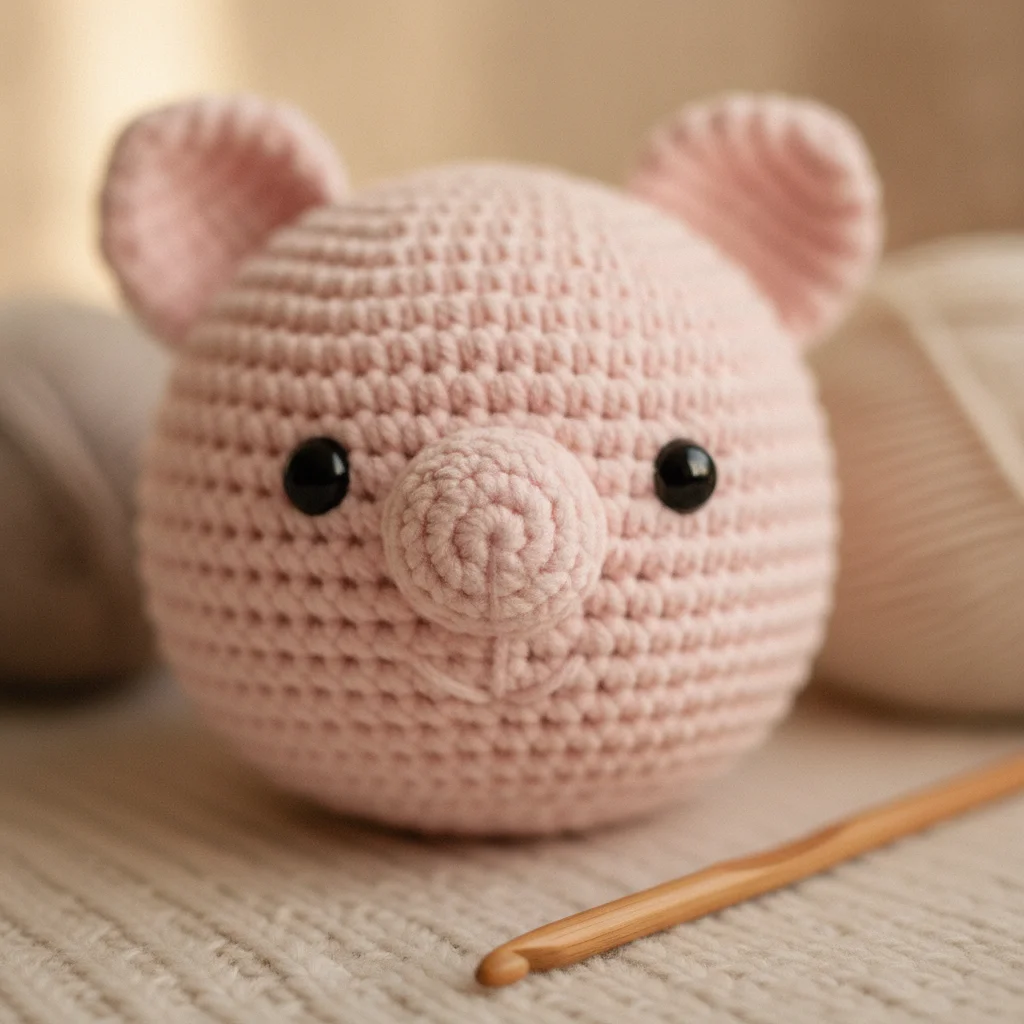
2. Crocheted Noses
Small crocheted noses are also a safe option for babies because they are securely sewn onto the main body of the toy.
How to Do It:
- Crochet a Small Piece: Typically, a small circle is formed by making 4-6 single crochet stitches into a magic ring. A few more rows can be crocheted as needed to give it a slightly conical shape.
- Yarn Selection: Use the same or a compatible, durable yarn as the toy itself.
- Sewing: Position the crocheted nose piece onto the toy's face and securely sew it to the toy's main body.
- When sewing, make sure to pass through each stitch of the nose piece and a corresponding stitch on the toy's face.
- Pass the thread through the same spot multiple times for extra security.
- Once sewing is complete, secure the thread by hiding it inside the toy.
General Safety Tips
- Securely Attach All Parts: Ensure that not just the nose, but also the ears, arms, legs, and all other attached parts are sewn on very securely.
- Use Durable Yarns: For baby toys, choose durable, wear-resistant yarns such as 100% cotton, mercerized cotton, or high-quality acrylic.
- Regular Checks: Regularly inspect the toys. If there are any loose stitches, frayed threads, or signs of detachment, repair them immediately or discontinue use of the toy.
- Washing Instructions: Ensure the toys are washable and maintain their shape and integrity even after washing.
Conclusion
Creating amigurumi toys for babies is one of the most beautiful ways to express your love and effort. You can make this process even more meaningful by always prioritizing the safety of the little ones. By choosing safe options like embroidered or crocheted noses, you can both showcase your creativity and create durable, loving toys that babies can play with safely.
For more tips and inspiration on your amigurumi journey, don't forget to follow us on Instagram: @aylawangurumi.